jQuery 请求代码:
$.ajax({
  url: "xxxxxx",
  //method: "GET", // 默认 GET(当 dataType 为 jsonp 时此参数无效,始终以 GET 方式请求)
  data: $('#myForm').serialize(), // 要传递的参数,这里提交表单 myForm 的内容
  dataType: "jsonp"
  //, jsonp: "callback" // 请求中的回调函数的参数名,默认值 callback
  //, jsonpCallback: "jQuery_abc" // 本地回调函数名,不指定则随机
})
  .done(function () {
    alert("done");
    if (true) {
      $('#myForm')[0].reset();
    }
  })
  .fail(function () { alert("fail"); })
  .always(function () { alert("complete"); });
ASP.NET 处理代码:
JavaScriptSerializer jss = new JavaScriptSerializer();

string json = jss.Serialize(new { result = new { success = true, msg = "成功" } });

if (!string.IsNullOrWhiteSpace(Request["callback"])
  && Regex.IsMatch(Request["callback"], @"[_$a-zA-Z][$\w]*"))
{
  Response.ContentType = "application/javascript; charset=utf-8";
  Response.Write(json + Request["callback"] + "(" + json + ")");
}
else
{
  Response.ContentType = "application/json; charset=utf-8";
  Response.Write(json);
}

Response.End();
1. 跨子域的iframe高度自适应
2. 完全跨域的iframe高度自适应
同域的我们可以轻松的做到
1. 父页面通过iframe的contentDocument或document属性访问到文档对象,进而可以取得页面的高度,通过此高度值赋值给iframe tag。
2. 子页面可以通过parent访问到父页面里引入的iframe tag,进而设置其高度。
但跨域的情况则不允许对子页面或父页面的文档进行访问(返回undefined),所以我们要做的就是打通或间接打通这个壁垒。
一、跨子域的iframe高度自适应
比如 'a.jd.com/3.html' 嵌入了 'b.jd.com/4.html',这种跨子域的页面
3.html
|
1 2 3 4 5 6 7 8 9 10 11 12 13 |
|
4.html
|
1 2 3 4 5 6 7 8 9 10 11 12 13 14 15 16 17 18 19 20 21 22 23 24 25 26 27 28 |
|
可以看到与上一篇对比,只要在两个页面里都加上document.domain就可以了
二、完全跨域的iframe高度自适应
分别有以下资源
- 页面 A:http://snandy.github.io/lib/iframe/A.html
- 页面 B:http://snandy.github.io/lib/iframe/B.html
- 页面 C:http://snandy.jd-app.com
- D.js:http://snandy.github.io/lib/iframe/D.js
这四个资源有如下关系
1. A里嵌入C,A和C是不同域的,即跨域iframe
2. C里嵌入B,C和B是不同域的,但A和B是同域的
3. C里嵌入D.js,D.js放在和A同域的项目里
通过一个间接方式实现,即通过一个隐藏的B.html来实现高度自适应。
A.html
嵌入页面C: http://snandy.jd-app.com
|
1 2 3 4 5 6 7 8 9 10 |
|
B.html
嵌入在C页面中,它是隐藏的,通过parent.parent访问到A,再改变A的iframe(C.html)高度,这是最关键的,因为A,B是同域的所以可以访问A的文档对象等。
|
1 2 3 4 5 6 7 8 9 10 11 12 13 14 15 16 17 18 19 20 21 22 23 24 25 26 27 28 |
|
C.html
嵌入在A中,和A不同域,要实现C的自适应,C多高则A里的iframe就设为多高。C里嵌入B.html 和 D.js
|
1 2 3 4 5 6 7 8 9 10 11 12 13 14 15 16 17 18 19 |
|
D.js
在页面C载入后计算其高度,然后将计算出的height赋值给C里引入的iframe(B.html)的src
|
1 2 3 4 5 6 7 8 9 10 11 12 13 14 15 16 |
|
线上示例:http://snandy.github.io/lib/iframe/A.html
Apple’s newest devices feature the Retina Display, a screen that packs double as many pixels into the same space as older devices. For designers this immediately brings up the question, “What can I do to make my content look outstanding on these new iPads and iPhones?”. First there are a few tough questions to consider, but then this guide will help you get started making your websites and web apps look amazingly sharp with Retina images!

Things to Consider When Adding Retina Images
The main issue with adding retina images is that the images are double as large and will take up extra bandwidth (this won’t be an issue for actual iOS apps, but this guide is covering web sites & web apps only). If your site is mostly used on-the-go over a 3G network it may not be wise to make all your graphics high-definition, but maybe choose only a select few important images. If you’re creating something that will be used more often on a WI-FI connection or have an application that is deserving of the extra wait for hi-res graphics these steps below will help you target only hi-res capable devices.
Simple Retina Images
The basic concept of a Retina image is that your taking a larger image, with double the amount of pixels that your image will be displayed at (e.g 200 x 200 pixels), and setting the image to fill half of that space (100 x 100 pixels). This can be done manually by setting the height and width in HTML to half the size of your image file.
<img src="my200x200image.jpg" width="100" height="100">
If you’d like to do something more advanced keep reading below for how you can apply this technique using scripting.
Creating Retina Icons for Your Website
When users add your website or web app to their homescreen it will be represented by an icon. These sizes for regular and Retina icons (from Apple) are as follows:
![]()
| iPhone | 57 x 57 |
|---|---|
| Retina iPhone | 114 x 114 |
| iPad | 72 x 72 |
| Retina iPad | 144 x 144 |
For each of these images you create you can link them in the head of your document like this (if you want the device to add the round corners remove -precomposed):
<link href="touch-icon-iphone.png" rel="apple-touch-icon-precomposed" />
<link href="touch-icon-ipad.png" rel="apple-touch-icon-precomposed" sizes="72x72" />
<link href="touch-icon-iphone4.png" rel="apple-touch-icon-precomposed" sizes="114x114" />
<link href="touch-icon-ipad3.png" rel="apple-touch-icon-precomposed" sizes="144x144" />
If the correct size isn’t specified the device will use the smallest icon that is larger than the recommended size (i.e. if you left out the 114px the iPhone 4 would use the 144px icon).
Retina Background Images
Background images that are specified in your CSS can be swapped out using media queries. You’ll first want to generate two versions of each image. For example ‘bgPattern.png’ at 100px x 100px and ‘bgPattern@2x.png’ at 200px x 200px. It will be useful to have a standard naming convention such as adding @2x for these retina images. To add the new @2x image to your site simply add in the media query below (You can add any additional styles that have background images within the braces of the same media query):
.repeatingPattern {
     background: url(../images/bgPattern.png) repeat;
     background-size: 100px 100px;
}

@media only screen and (-webkit-min-device-pixel-ratio: 2) {
     .repeatingPattern {
          background: url(../images/bgPattern@2x.png) repeat;
     }
}
JavaScript for Retina Image Replacement
For your retina images that aren’t backgrounds the best option seems to be either creating graphics with CSS, using SVG, or replacing your images with JavaScript. Just like the background images, you’ll want to create a normal image and one ‘@2x’ image. Then with JavaScript you can detect if the pixel ratio of the browser is 2x, just like you did with the media query:
if (window.devicePixelRatio == 2) {

//Replace your img src with the new retina image

}
If you’re using jQuery you could quickly replace all your images like this very basic example below. It’s a good idea to add a class to identify the images with hi-res versions so you don’t replace any others by mistake. I’ve added a class=”hires” for this example. Also make sure you have the standard (non-retina) image height and width set in the HTML:
<img class="hires" alt="" src="search.png" width="100" height="100" />
<script type="text/javascript">
$(function () {

	if (window.devicePixelRatio == 2) {

          var images = $("img.hires");

          // loop through the images and make them hi-res
          for(var i = 0; i < images.length; i++) {

            // create new image name
            var imageType = images[i].src.substr(-4);
            var imageName = images[i].src.substr(0, images[i].src.length - 4);
            imageName += "@2x" + imageType;

            //rename image
            images[i].src = imageName;
          }
     }

});
</script>
Server-Side Retina Images
If you’d like to implement a server-side retina image solution, I recommend checking out Jeremy Worboys’ Retina Images (which he also posted in the comments below). His solution uses PHP code to determine which image should be served. The benefit of this solution is that it doesn’t have to replace the small image with the retina one so you’re using less bandwidth, especially if you have lots of images that you’re replacing.
Website Optimization for Retina Displays
If you’re looking for additional information on creating Retina images, I’ve recently had a short book published called Website Optimization for Retina Displays that covers a range of related topics. It contains some of what is above, but also includes samples for many different situations for adding Retina images. It explains the basics of creating Retina images, backgrounds, sprites, and borders. Then it talks about using media queries, creating graphics with CSS, embedding fonts, creating app icons, and more tips for creating Retina websites.
一般来说,我们在写博客或做网站时都需要对插图做一些效果,比如增加阴影、图片圆角、倒映等等。这些效果一般可以用3个方法实现,一是用PS实现对图片进行修改,二是使用CSS,三是使用JavaScript。使用PS会破坏原图,而且要花费一定的时间。Netzgesta上有很多实现图片特效的JavaScript提供下载,很多效果都是相当漂亮的。
1、水倒映
这个js将为图片添加水倒映的特效,时下web2.0站点很喜欢这种效果。
如果你喜欢在线生成水倒映效果,可以参考这里。
2、圆角+阴影

或许你记得用RoundPic能在线生成圆角图片,事实上用这个js也可以实现效果。
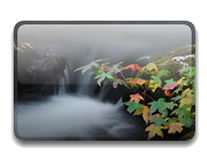
3、高光圆角阴影
这个效果可以用来做按钮。是我最喜欢的特效之一。
4、斜光阴影效果

和上面的效果看起来非常相似,但也有不同的地方。
5、相框效果
如果你在做图片博客,可以你会喜欢这个js,使用后博客文章内的图片都有相框的效果。
6、黑色相框
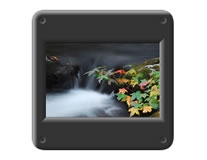
不喜欢白色没有立体感的相框,那试试这个立体感充足的js效果吧。
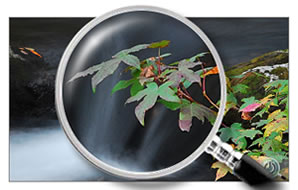
7、放大镜
一个很有趣的js,实现放大镜效果。记得在去年Google开发者日的时候,某个主讲人也有说到在GMaps里实现放大镜的有趣效果。具体效果点击这里。
8、菲林效果

如果你在写一个电影博客,这个效果或许会让你喜欢。
9、花边效果

很简单的图片花边效果。
10、翻页效果
翻页效果是很常见的,Google一下你会发现有很多相关的教程,如果你不想花时间去学,直接下载这个js吧。
安装使用方法:
将下载的压缩包解压之后上传到网站空间,然后在需要显示效果的head里添加代码,比如高光阴影效果Glossy,添加的代码是:
<script type="text/javascript" src="glossy.js"></script>
对于Wordpress,可以在header.php里添加。如果只要求文章页里出现效果,也可以考虑在single.php里添加。
然后,在想要显示特效的图片的<img>标记里添加:
class="glossy"
这样效果就出现了。
其它效果添加方法类似。
via BlogOhblog。
下载地址(eMule):http://www.verycd.com/topics/69331/
中文名称:张孝祥IT课堂-JavaScript教学视频录像
地区:大陆
语言:普通话
简介:

张孝祥IT课堂-JavaScript教学视频录像
隆重发行
经过张孝祥老师三个月的潜心制作,《张孝祥IT课堂-JavaScript教学视频录像》终于面世了。新版的《张孝祥IT课堂-JavaScript教学视频录像》 秉承《张孝祥IT课堂-Java教学视频录像(高级篇)》身临其境的手把手教学风格,并且采用了高效数字编码算法和全新的多媒体播放器,图象更清晰、操作更方便,最直观地让学员身临其境地学习和感受编程的乐趣,更能体会张孝祥老师授课的震撼力和穿透力。
光盘的内容:本教程结合大量应用实例,详细地讲解了HTML语言、CSS、JavaScript、DOM对象模型编程、正则表达式,并介绍了网页脚本编程的其它相关技术和知识,例如,VBScript、NetScape控件、ActiveX控件、Java Applet小程序等。本书力求在不减少知识信息量的情况下,能够把书写薄,同时又能把问题说透,让读者能够迅速上手,尽最大可能地扩展读者的知识面,启发读者自我思考和学习的能力,让读者感受到技术学习所带来的快乐。本教程主要面向网站开发人员,也适于普通前端网页设计人员阅读。考虑到适应实际工作中的不仅仅需要编程语言本身,还要有一些计算机相关的周边知识的特点,所以,本教程从原理和细节上着手,让读者对一些专业术语透彻理解,尽最大程度扩展读者的知识面。本教程强调用最短的时间和最浅显易懂的例子说明问题,启发读者思考和自我解决问题的能力,以知识够用为原则,重视学会的本质,能让读者做一些基本的应用开发,碰到新问题时,能自己查阅资料独立解决,就叫学会,没有任何人能掌握一门学科的每个细节。
JavaScript教学视频录像总时间为40小时左右,为了让用户了解到更为精确的信息,本站以后不再使用光盘的张数来作为产品的度量单位,而改用视频教程的时间来度量。
说明:
javascript教程进行了部分加密,加密部分在未注册的计算机上不能播放,用户需要向我们索取注册码后对计算机进行注册,每台计算机的注册码都不一样。 如果计算机的CPU识别信息、硬盘序列号、硬盘分区、内存等这四个内容之一发生了变化,就可能导致软件认为是在另外一台计算机上运行,为此,我们可以为每个用户从购买之日算起的每年都提供三个注册码。 我们每年为用户提供三个注册码,主要是为了方便用户硬件升级或更改后能继续使用,希望大家不要随意替他人索取注册码,以免影响自己使用。
由于加密后的视频具有对计算机资源要求高、启动时间长等缺点,所以,本套视频教程采用了部分视频片段加密、部分视频片段不加密的混合方式发行。
如何理解JavaScript、Java、Jsp、J2ee之间的关系与区别
很多初学习者对JavaScript、Java、Jsp、J2ee之间的关系与区别总是感到很困惑,为了帮助大家快速理解几者之间的关系,我们进行了如下解释说明:
1. JavaScript用于编写嵌入在网页文档中的程序,它由浏览器负责解释和执行,可以在网页上产生动态的显示效果和实现与用户交互的功能,譬如,让一串文字跟着鼠标移动,让一个图标在网页漂浮移动,验证用户输入的信用卡号的格式正确与否,等等特效网页功能。
2. Java则是一种基础性的语言,学习jsp,j2ee都要有java的基础。无论你是想成为诗人,还是小说家,还是散文家,甚至就是当记者,你都要学习语文吧,Java就相当于语文、Jsp、J2ee则相当于小说、散文等。学好了语文,你能否就会有一份好的职业呢?不见得吧,但至少机会要多多了,语文学得越好,就更容易成为小说家,或是记者等等了。要想成为记者、散文家等等,没有语文是怎么都不行的。
3. jsp用于让www服务器产生出内容可以变化的网页文档和对用户提交的表单数据进行处理,例如,显示留言内容,留言内容总是在增加的,所以,传递给用户浏览器的网页文件内容是需要改变的,这就是jsp来实现的。将用户留言插入到数据库中,也是jsp来实现的。
4. j2ee用于开发大型的商业系统,例如,你在各个银行之间的取款,存款,银行之间要互通有无,执行存取款的记录操作,还要进行安全性检查,不能谁都可以来查帐,还要考虑网络断线等问题。使用j2ee,你就不用编写这些底层的细节程序代码了,而将精力集中到应用的业务流程设计上。
<INPUT onfocus="oRng=this.createTextRange();oRng.collapse(true);oRng.moveStart('character',3);oRng.select()" value=abcdefg type=text name=text1>
当焦点移至文本框时光标定位在位置3。
如果要直接定位在文本末尾,把上面的数字 3 改为 this.value.length 即可。

